One of my favorite parts of being a mom is spending time in the kitchen with my kids.
There’s something special about making snacks together, laughing over spills, and tasting little bits along the way.
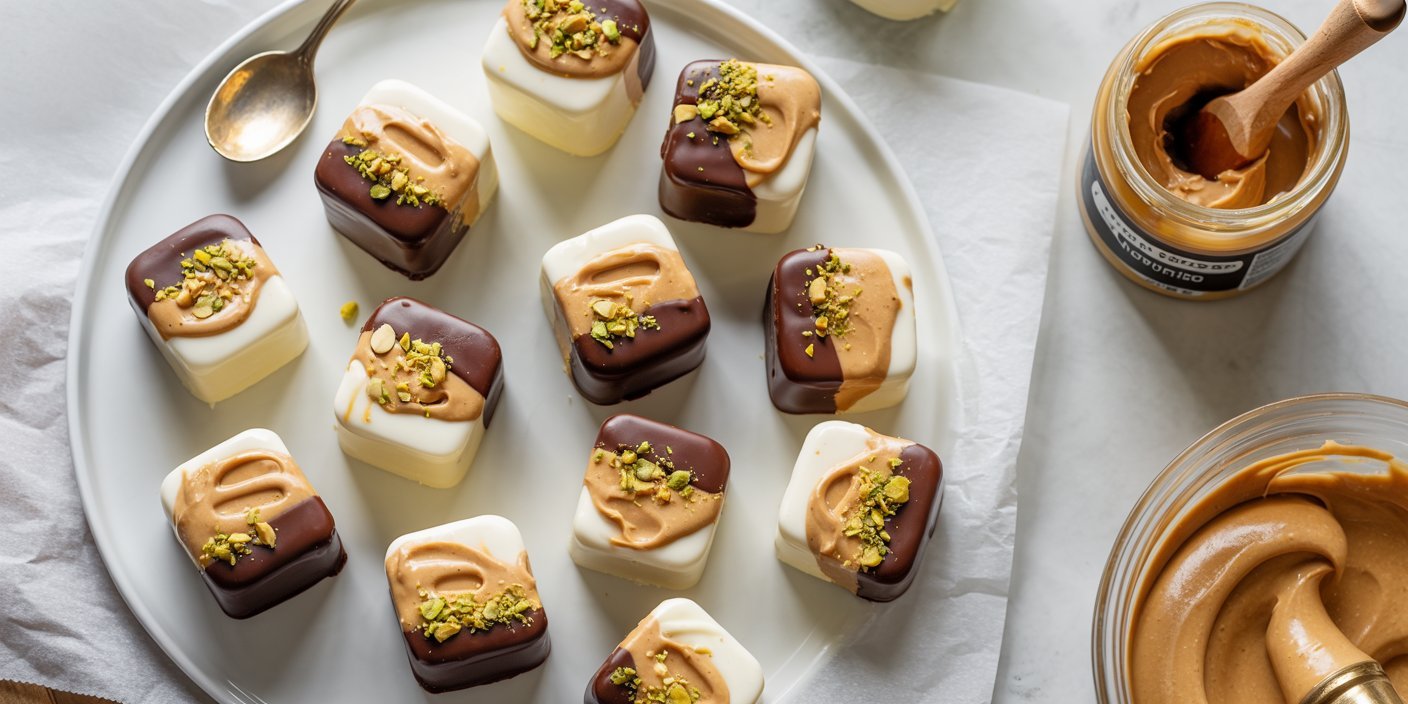
These Frozen Yogurt Peanut Butter Treats have become a family tradition in our home.
They’re creamy, naturally sweet, full of nutty flavor, and just the right amount of chocolate to feel like a real treat—without overloading on sugar.
I first started making these as a quick after-school snack. My kids would come home starving, and I wanted something wholesome, fun, and hands-on.
Now, it’s our little kitchen ritual: they measure, stir, and sometimes sneak a few bites before the treats even make it to the freezer.
Over time, we’ve discovered how fun it is to experiment with flavors and textures together.
Almond butter instead of peanut butter, a sprinkle of toasted coconut, or rolling them in crushed nuts—each batch feels new and exciting.
The beauty of this recipe is that it uses simple ingredients I always have on hand—plain Greek yogurt, nut butter, honey, and chocolate.
No baking, minimal cleanup, and lots of room for family creativity. Here’s how we make our favorite frozen snack together.
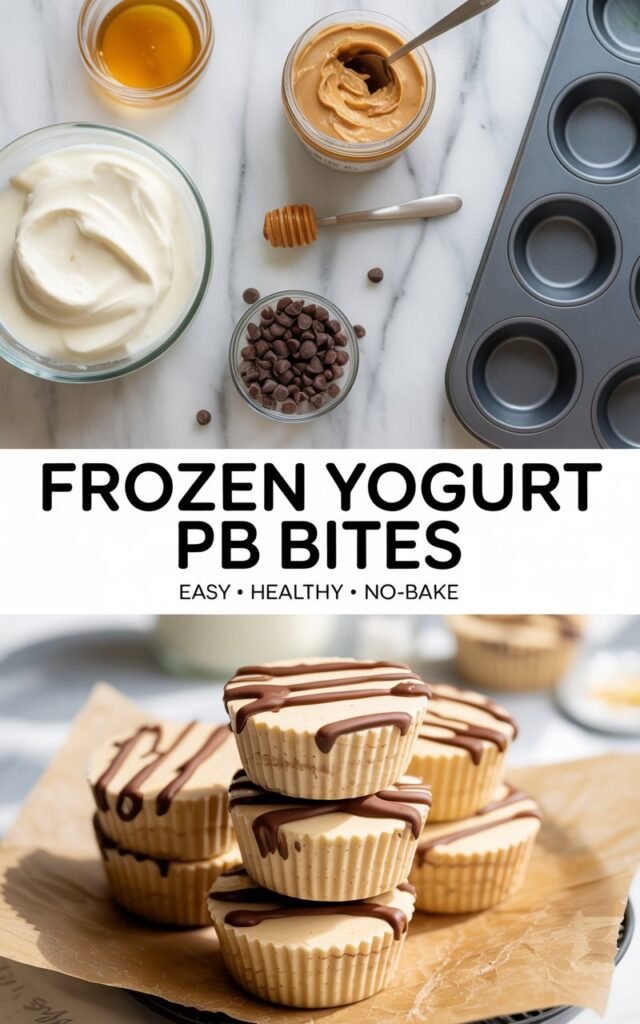
Ingredients We Use
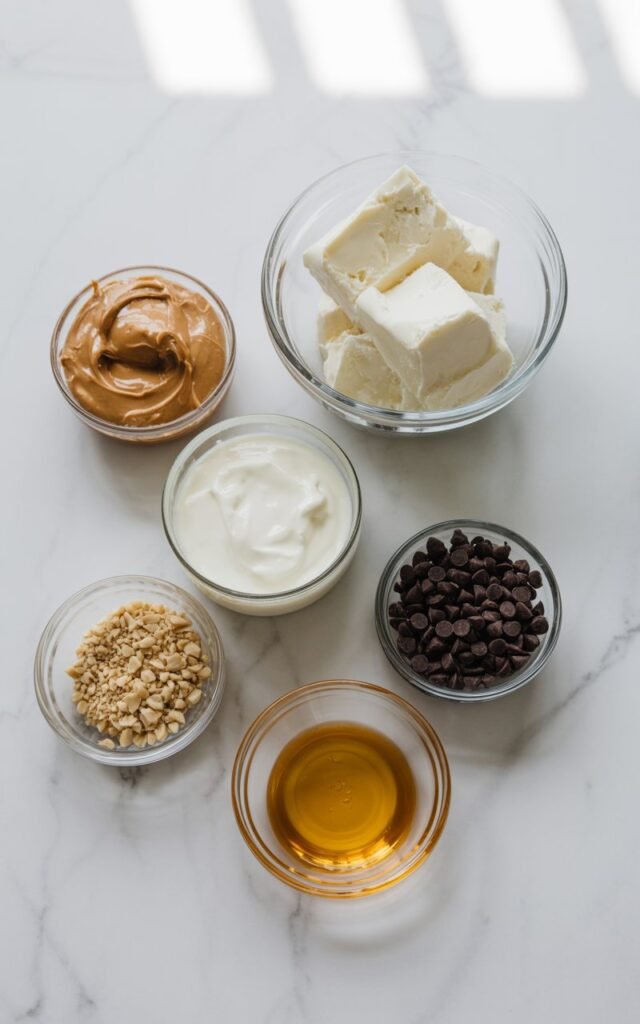
For the frozen bites (makes about 12–15):
- 1 cup plain Greek yogurt (full-fat or nonfat works)
- 1/4 cup creamy peanut butter (or almond/cashew butter for a twist)
- 2 tablespoons honey (maple syrup works for a vegan version)
- 1/2 teaspoon vanilla extract
- 1/4 cup mini chocolate chips (plus a few extras for topping)
For the chocolate coating:
- 1 cup dark chocolate chips (or semi-sweet)
- 1 teaspoon coconut oil (optional, makes chocolate smoother)
Optional fun toppings:
- Crushed peanuts
- Shredded coconut
- Flaky sea salt
Step 1: Mix the Yogurt Base with the Kids
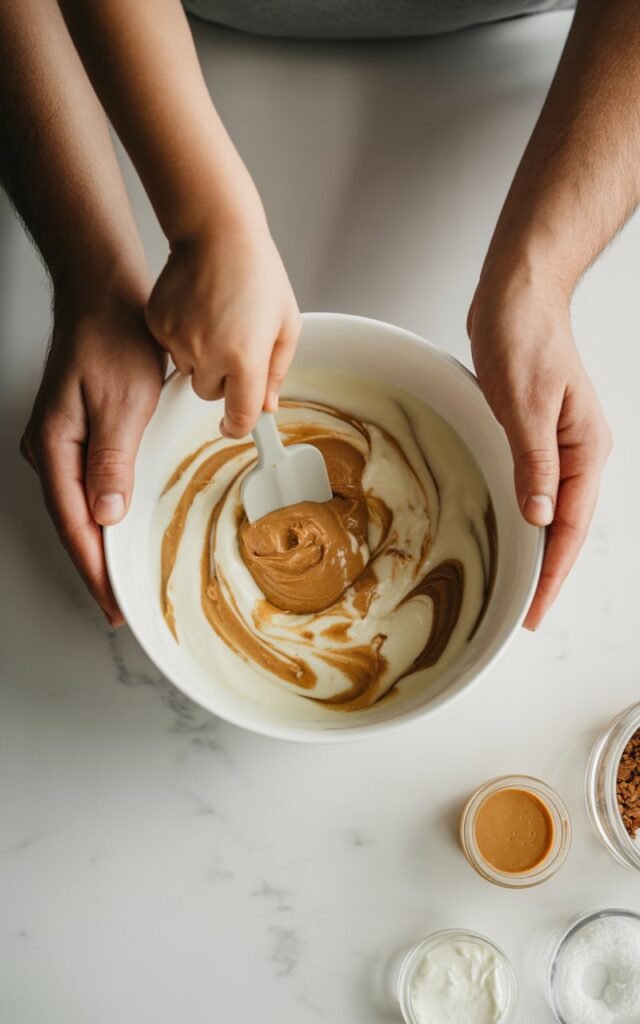
We always start by combining the yogurt, peanut butter, honey, and vanilla in a medium bowl.
I let my kids take turns stirring, which sometimes gets a little messy, but that’s part of the fun. The goal is a thick, creamy mixture that’s smooth and spoonable.
Once that’s ready, we gently fold in the mini chocolate chips, saving a few to sprinkle on top.
Tip from our kitchen: If your peanut butter is really thick, warming it for 10–15 seconds in the microwave makes mixing much easier—especially if little hands are helping.
Step 2: Shape the Bites
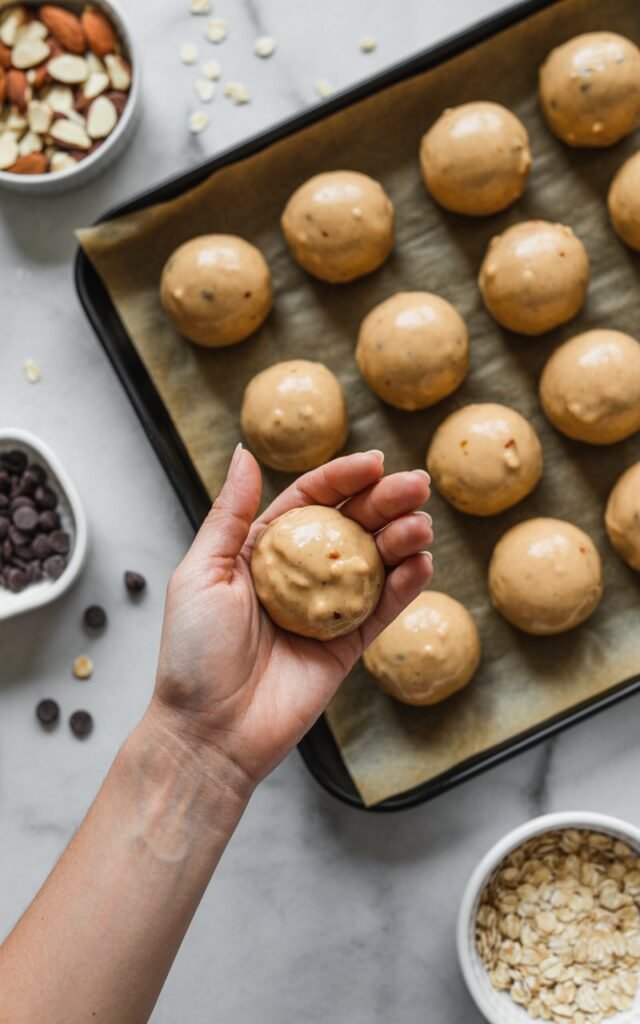
Next, we line a baking sheet with parchment paper.
Using a small cookie scoop or tablespoon, we drop little mounds of the mixture onto the tray.
Sometimes my kids like to shape them into discs, other times we leave them as little rounded bites. Both work perfectly.
We freeze them for 1–2 hours until firm. Freezing is key because solid bites make coating with chocolate much easier.
If freezer space is limited, you can place the bites on a plate, making sure they don’t touch.
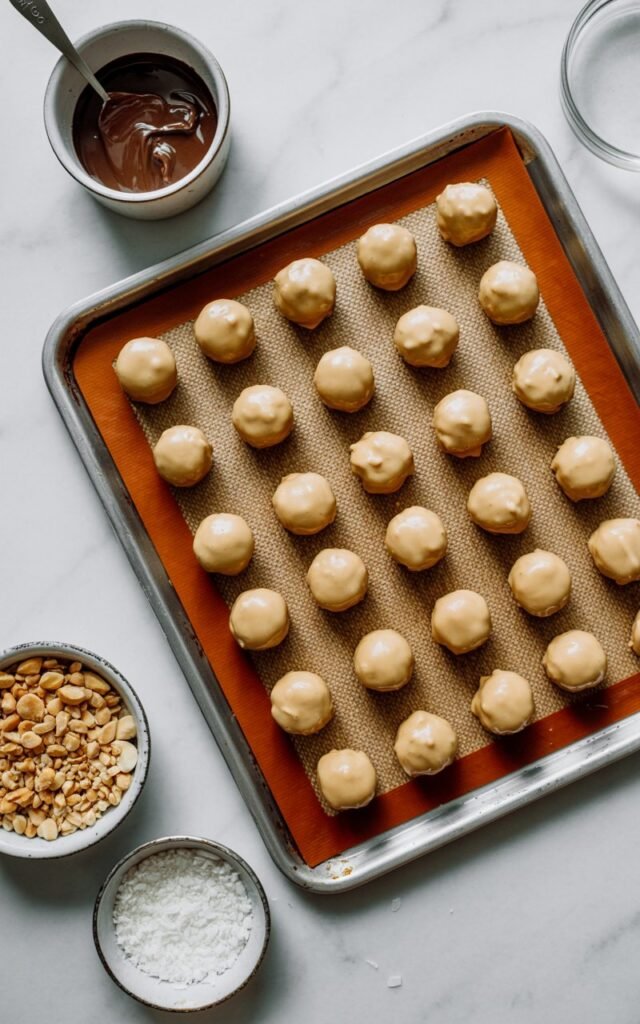
Step 3: Melt Chocolate Together

While the bites are freezing, we melt the chocolate.
I combine chocolate chips and coconut oil in a microwave-safe bowl, microwaving in 30-second intervals and stirring in between until smooth.
The kids love stirring the chocolate, especially when it starts to melt into a glossy, rich consistency.
For those who prefer the stovetop, a double boiler works perfectly, too.
Watching the chocolate melt is almost magical for my little helpers.
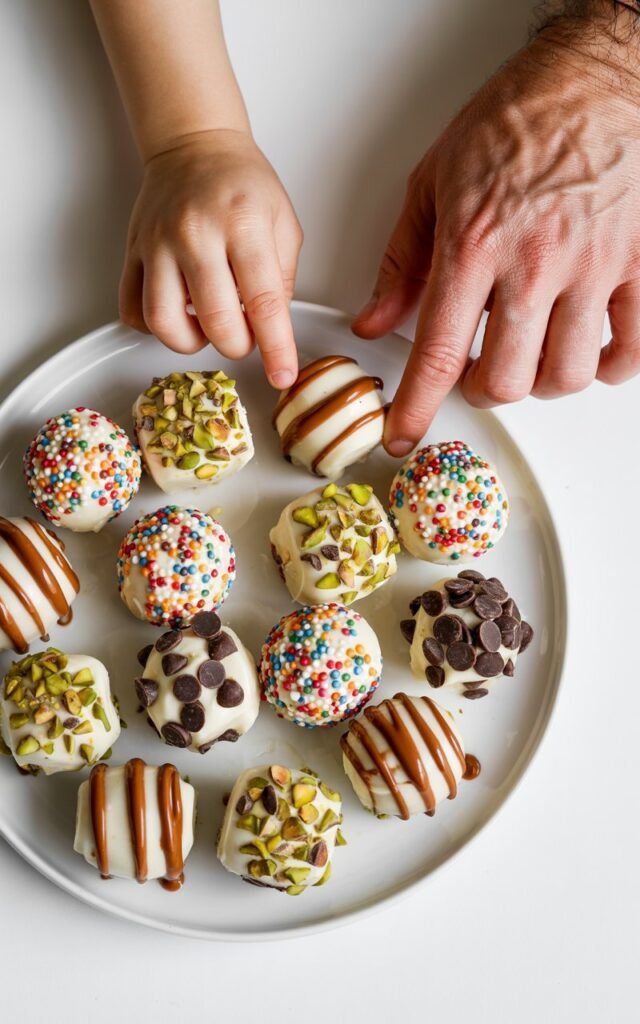
Step 4: Dip, Decorate, and Make Memories
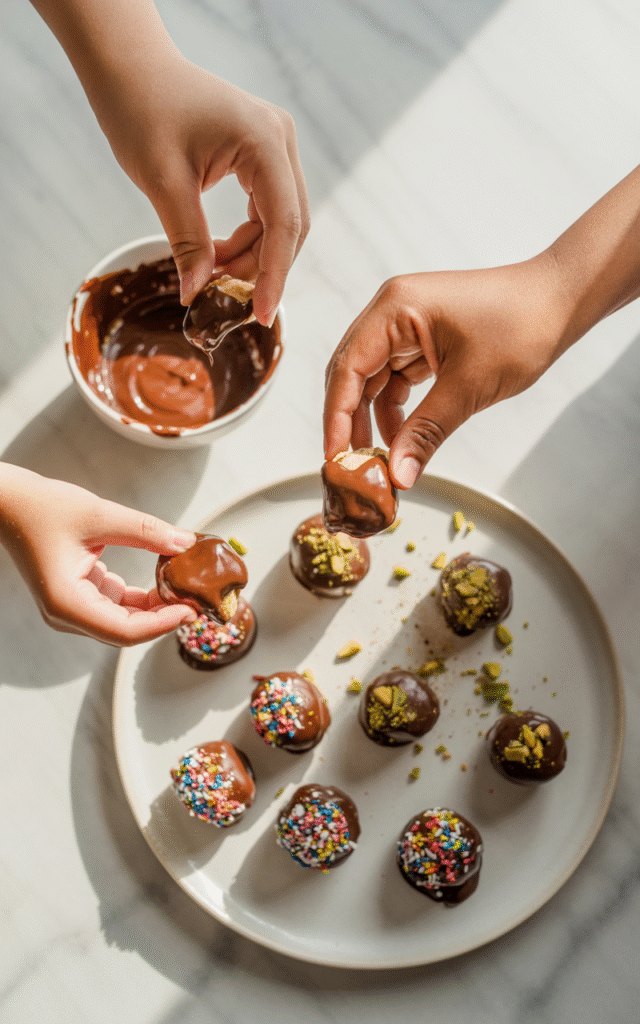
Once the bites are frozen, we set up a dipping station with melted chocolate, toppings, and a parchment-lined tray.
This is always the highlight: dipping the cold bites into warm chocolate, tapping off the excess, and decorating with crushed peanuts, coconut, or a sprinkle of chocolate chips.
The kids get so proud when they see their decorated bites line up on the tray.
Pro tip: Work quickly. The chocolate sets fast on the frozen bites, but that’s part of the fun—it’s like a race against the chocolate!
Step 5: Freeze Again
After dipping, we return the tray to the freezer for 15–20 minutes to let the chocolate fully harden.
This last step locks in the perfect crunch and creamy center. When it’s time to taste,
I usually let the bites sit at room temperature for a minute or two so the centers are extra soft and creamy.
Step 6: Storing for Family Snacking
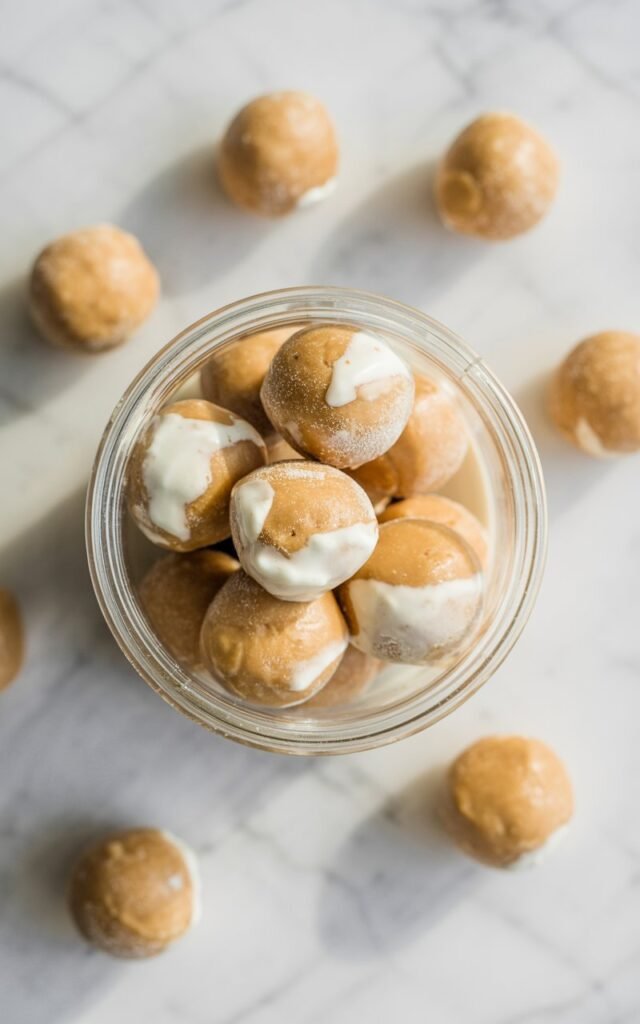
We keep our frozen bites in an airtight container in the freezer. I like to layer them between parchment paper so they don’t stick together.
This makes it easy to grab a few whenever someone wants a snack, a little post-dinner treat, or a quick boost after sports practice.
Fun Family Variations
Over time, we’ve played with different flavors and textures:
- Almond Joy Inspired: Almond butter, shredded coconut, and chopped almonds.
- Cookie Dough Style: Extra chocolate chips, a pinch of salt, skip the coating if desired.
- Vegan Version: Plant-based yogurt, maple syrup, and vegan chocolate chips.
- Extra Protein: Stir in a scoop of protein powder for an energy boost—perfect for after sports or dance practice.
Kitchen Tips From a Mom

- Small bites freeze faster and are easier for little hands to handle.
- Don’t rush the freezing steps; solid bites make chocolate coating easier.
- If chocolate starts thickening during dipping, a quick microwave stir brings it back to silky smooth.
- Work in batches if needed—keep some bites in the freezer while dipping others to prevent melting.
Frequently Asked Questions
Can I make these dairy-free or vegan?
Yes! Use plant-based yogurt, swap honey for maple syrup, and choose vegan chocolate chips.
How long do they last in the freezer?
Up to three weeks in an airtight container.
Can I skip the chocolate coating?
Absolutely. They’re still creamy and delicious frozen on their own.
Can I use crunchy peanut butter?
Yes! It adds texture. Just stir well to blend the oils.
Why My Family Keeps Coming Back
These Frozen Yogurt Peanut Butter Treats have become more than a snack—they’re a small family tradition. Making them together is half the fun.
The kids learn measurements, experiment with flavors, and we all get to enjoy the results.
They’re easy to prepare, freezer-friendly, and endlessly customizable.
Whether it’s an after-school snack, a healthier dessert, or a post-workout treat, these frozen bites always satisfy.
Every time I see my kids’ faces light up when biting into one, I know it’s worth every second in the kitchen.
These are more than treats—they’re memories frozen in chocolate and peanut butter.